 2709 N Hayden Island Dr, STE 809689, Portland, Oregon, 97217 USA


MotoHorn User Manual for Vehicles

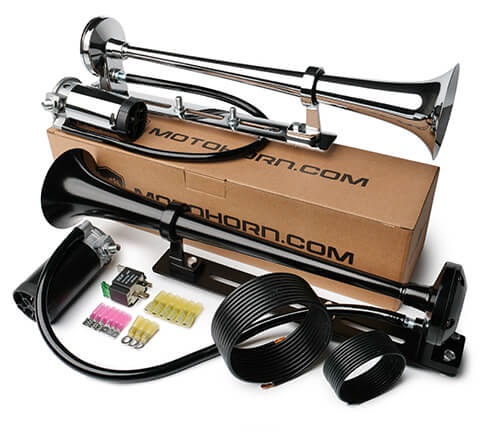
PACKAGE CONTENTS
1x
1x
1x
1x
1x
1x
15x
MotoHorn trumpet air horn
MotoHorn 12V compressor
Mounting plate
Air line
Relay with 30A fuse
User manual
Heat-shrinkable connectors (5 extra)
12 & 18 AWG Wire
Bolts and rubbers for mounting

More than one MotoHorn? Repeat the full installation!
SAFE INSTALLATION
- Follow this user manual.
- Power off your vehicle before the installation.
- Do not install MotoHorn directly to the stock horn wires, use 12 AWG wire.
- Use one relay and compressor per horn.
- Heat shrink the crimp wire connectors, don’t use open flame near your vehicle.
- The air line can be extended without any loss of performance.
- Avoid hard bends on the air line to provide free air flow.
- Keep the compressor away from parts that produce a lot of heat.
- TIP: Keep your stock horn(s) connected to its wires when wiring MotoHorn. This way all horns activate at once for train-like tones — highly recommended!

If you follow the next steps, no mechanical or electrical knowledge is required

MOUNTING THE HORN
- MotoHorn trumpet can be unscrewed from its base, tighten it securely.
- Use the provided mounting plate for easier installation.

Mounting examples:
See the Review Section →
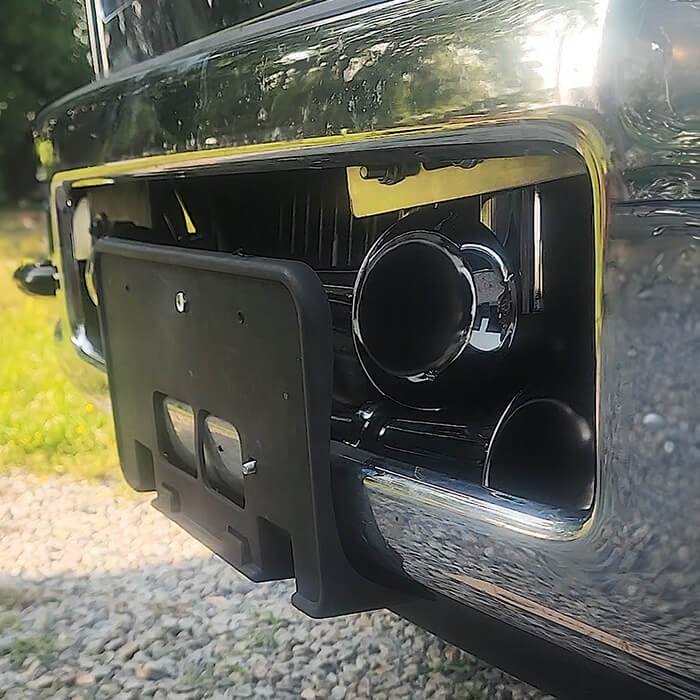
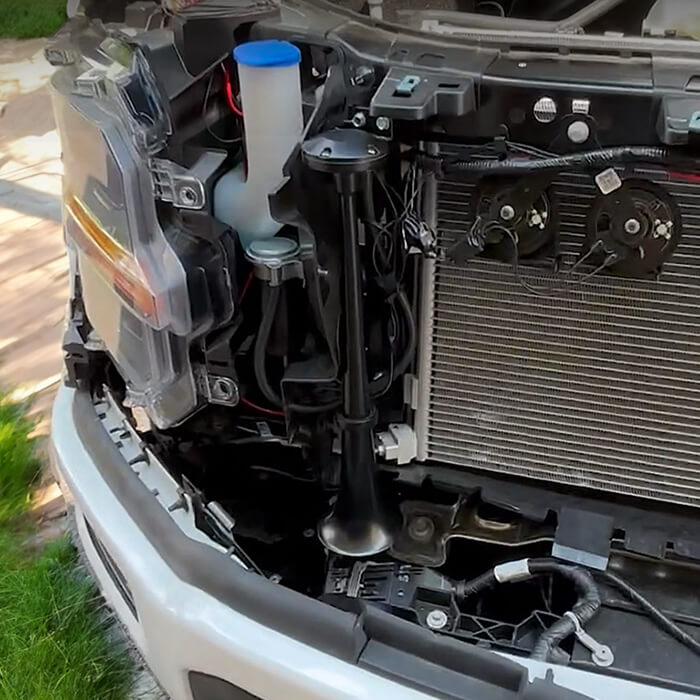
The most common mounting spots with picture examples below:
- Behind the front grille
- Inside the engine bay
- Front frame area
- Below the vehicle
- Behind the front bumper
- Attached to any bolt on your vehicle.


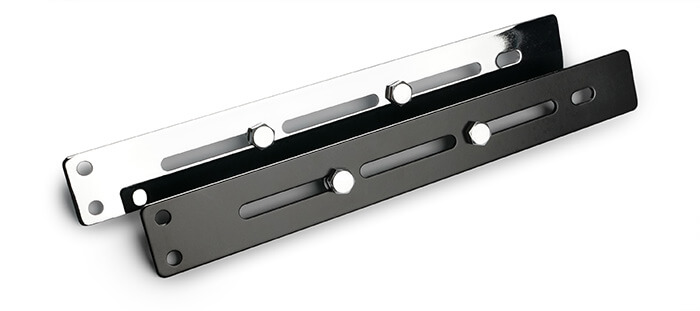
MOUNTING PLATE
You can attach the trumpet to the plate and use its center holes to install it on your vehicle. We also provide the bolts and vibration damping rubbers that you can use.
MOUNTING THE COMPRESSOR
The compressor has a small bolting edge and can be bolted down to any available bolt. You can mount it close to the trumpet or extend the air line if necessary.
TIP: Install the compressor in a dry area to help extend its lifespan.

WIRING THE HORN
12 AWG WIRE IS THICKER WIRE
18 AWG WIRE IS THINNER WIRE
Crimp the connectors tightly and use a heat gun or a lighter to shrink them around the wire. Don’t use open flame near your vehicle.
Note: One relay and compressor should be used for each horn.
If you wish to install multiple horns, then simply repeat the same wiring steps again and use a separate relay.
INSTALLING THE RELAY
We recommend keeping the relay closer to the battery and in a dry area. Relay pins are numbered.
Use red connectors and 18 AWG wire:
- Connect pin 85 and 86 to the wires behind the stock horn.
- It won’t matter which pin gets positive or negative (works both ways).
- TIP: Keep the stock horn connected to its wires for train-like tones — best sound!
The relay has a green built-in fuse, make sure it is seated properly.
Your relay is now operational.
FINAL CONNECTIONS
Use yellow connectors and 12 AWG wire:
- Connect pin 30 to your battery positive.
- Connect pin 87 to your compressor positive.
- Connect compressor negative to the battery negative, or ground it to frame.

Congratulations! Your MotoHorn is ready to use!
ALTERNATIVE WIRING METHODS
(Optional and not required)
AUX switch wiring (ON/OFF switch)

Your vehicle’s upfitter (auxiliary) switches can be used to toggle MotoHorns ON/OFF from the steering wheel horn button.
To operate MotoHorn, you’ll need at least one auxiliary switch rated at 20A or higher — or multiple switches for multiple MotoHorns.
(15A AUX works too, but not at peak performance.)
(40A+ AUX can power two horns — use two 12 AWG wires to the AUX to avoid bottlenecks.)
Wire relay pin 30 as follows:
- Use 12 AWG wire (the thicker one).
- Connect relay pin 30 to your auxiliary switch output — located in the engine bay.
- Follow manual STEP 2 to connect the remaining relay pins — pin 85, 86 and 87.

Done! Your MotoHorn is now only active when you press the steering wheel button and the auxiliary switch is in the ON position.
AUX switch wiring (horn button)
Your vehicle’s upfitter (auxiliary) switches can be used as a horn button for MotoHorns.
To operate one or multiple MotoHorns, you’ll need just one auxiliary switch — it can have any amperage rating.
Wire relay pin 85 and 86 as follows:
- Use 18 AWG wire (the thinner one).
- Connect relay pin 86 to your auxiliary switch output — located in the engine bay.
- Connect relay pin 85 to the battery negative, or ground it to the frame.
- Follow manual STEP 2 to connect the remaining relay pins — pin 30 and 87.

(For multiple MotoHorns, extend the pin 85 and 86 connections to each MotoHorn relay.)
Done! Your MotoHorn is now active as soon as you flip the auxiliary switch to the ON position.
Toggle ON/OFF switch wiring
A separate toggle switch can be used to toggle MotoHorns ON/OFF from the steering wheel horn button.
This switch should be installed on one of the wires that connects your stock horn wire to the MotoHorn relay.
Wire relay pin 85 or 86 as follows:
- Use thin wire (e.g. 18-22 AWG).
- Connect one end of the toggle switch to relay pin 85 or 86.
- Connect other end of the toggle switch to one of the stock horn wires.
- Follow manual STEP 2 to connect the remaining relay pins — pin 30, 87 and 85.

(The same toggle switch can operate multiple MotoHorns. Simply connect it to the same pin on each MotoHorn relay.)
Done! Your toggle switch now cuts out one of the relay wires, making your MotoHorn active only when desired.
Separate horn button wiring
A new horn button can be added if you wish to wire MotoHorns on a fully independent circuit.
This completely separates the factory horn and the Motohorns.
Wire relay pin 85 and 86 as follows:
- Use thin wire (e.g. 18-22 AWG).
- Connect pin 85 to your battery negative.
- Connect pin 86 to your new horn button.
- Connect your new horn button to the battery positive.
- Follow manual STEP 2 to connect the remaining relay pins — pin 30 and 87.

(The same horn button can operate multiple MotoHorns. Simply repeat these connections on each MotoHorn relay.)
Done! Your new horn button now carries battery positive to your MotoHorn relay, making MotoHorn active when you press the button.
Need help? Email us:
support@motohorn.com