 2709 N Hayden Island Dr, STE 809689, Portland, Oregon, 97217 USA


Dual Track User Manual for Motorcycles

PACKAGE CONTENTS
1x
1x
1x
2x
2x
400 Hz horn
500 Hz horn
User manual
Mounting brackets (2 layers)
Y-split wire connectors
Bolts and nuts for mounting


Dual Track works on any vehicle that has a 12V battery
SAFE INSTALLATION
- Follow this user manual.
- Power off your motorcycle before the installation.
- Keep the horns away from parts that produce a lot of heat.
- Follow STEP 2 for plug-and-play wiring.
- Follow STEP 3 if STEP 2 does not work. (Relay kit needed.)
- TIP: Install Dual Track to the stock wires and also keep your old horn connected for triple tones. (Relay kit needed.)

If you follow the next steps, no mechanical or electrical knowledge is required

MOUNTING THE DUAL TRACK
- Dual Track brackets can be rotated 360 degrees and are double layered.
- Split brackets into 2 or 4 separate brackets for secure mounting.
- RECOMMENDED: Use thread lock glue.
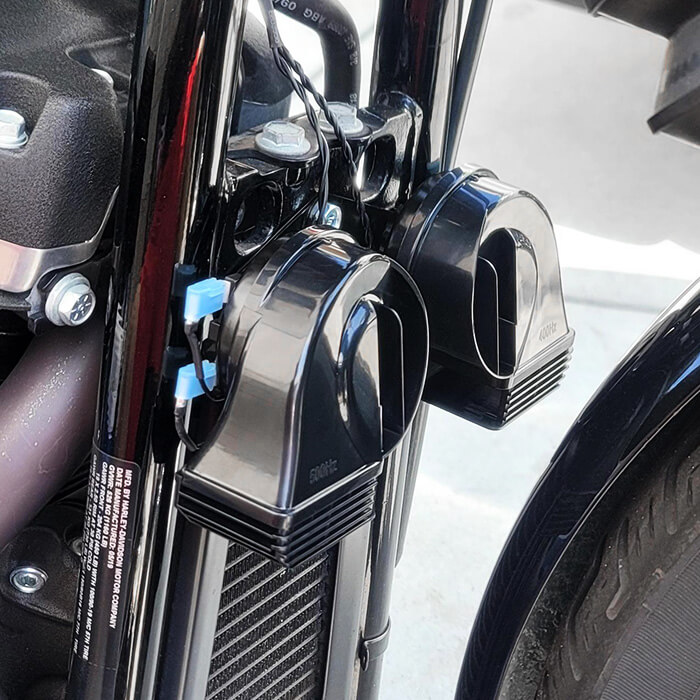
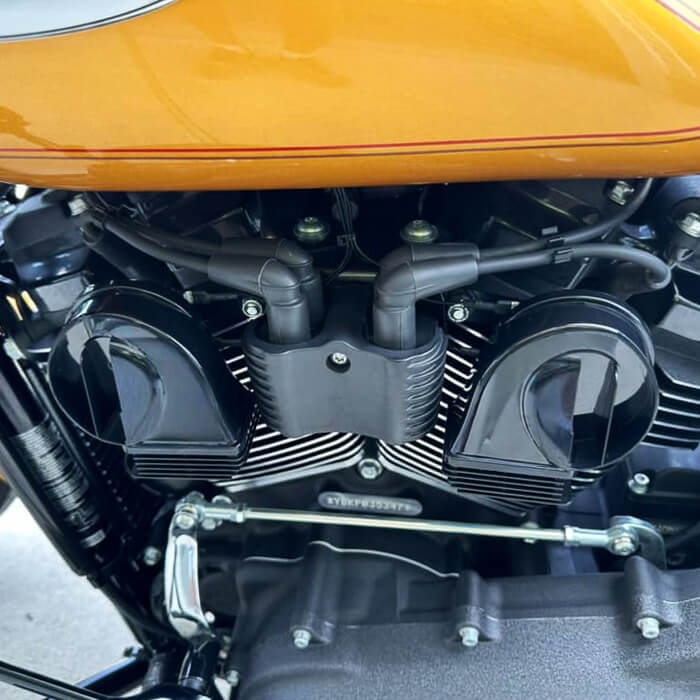
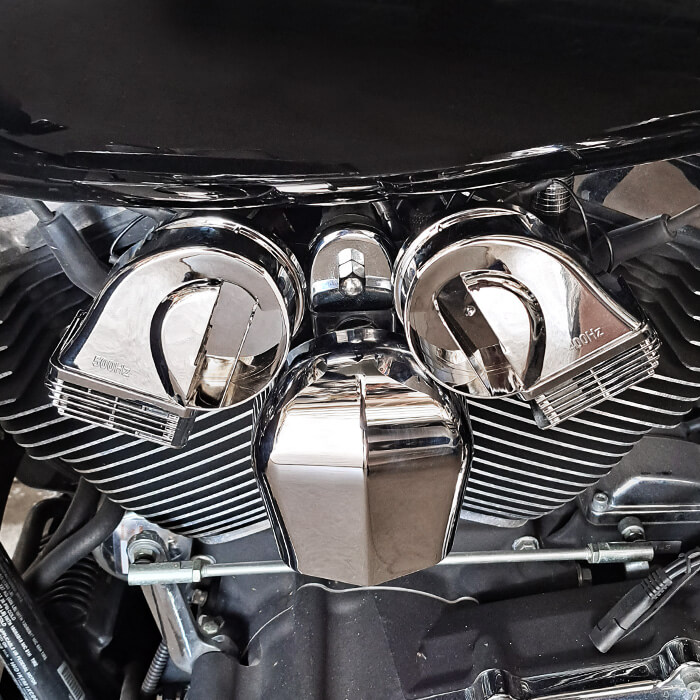
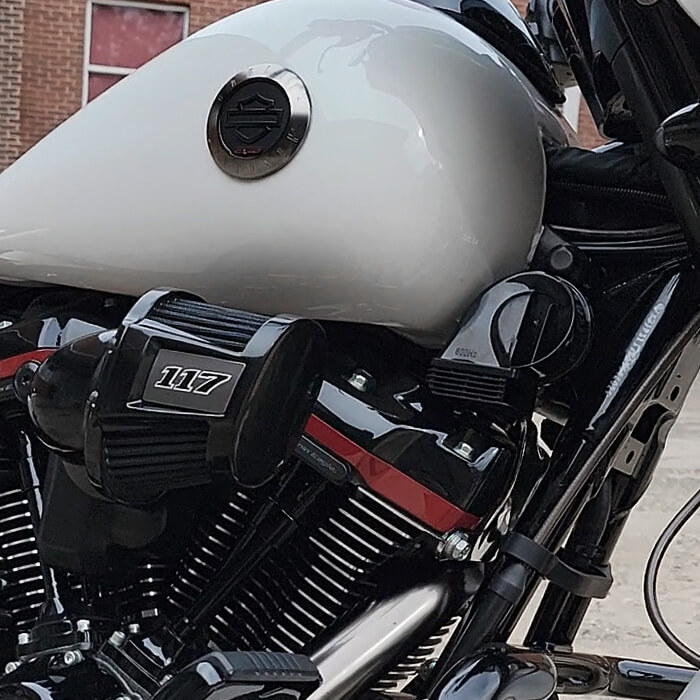
You can install both 400/500 Hz horns together or separately to any available bolt. The horn center bolt can be also used for mounting.
BEST MOUNTING SPOTS
- Front frame bar area.
- Direct stock horn replacement.
- To the sides of the coil pack.
- Next to the stock horn, using its bolt.
- Separately to any bolt, eg. fuel tank bolts.
- Rear end of the motorcycle — common on sport bikes.


PLUG-AND-PLAY WIRING
On most rides, Dual Track will be loud with just stock wiring. However, we recommend following STEP 3:
- If you want guaranteed peak loudness.
- If you get only 1 honk, or no honks at all.
- If you want to keep the stock horn for triple tones.
VIDEO FOR PLUG-IN WIRING
CONNECTING THE HORNS
Some additional 14 AWG wire might be required if you wish to extend Dual Track wires.
Use the Y-split wires provided:
- Connect Y-wire from one stock horn wire to both dual horns.
- Repeat this with the second stock horn wire.
Dual Track pins work both ways — positive and negative terminals are not marked.

Congratulations! Your Dual Track is ready to use!

RELAY KIT — OPTIONAL
If you’re only getting a single honk, no honks at all, or if the sound with Y-split wires is weak — it means your stock wiring is too thin and can’t support louder horn upgrades.
In that case, switching to a relay wiring method will fix the issue and give you full volume.
Parts needed:
- Some 14 AWG wire.
- Some thinner 18 AWG wire.
- A 4 pin 12V relay, rated anywhere between 10 and 40 amperes.
- Some crimp terminal connectors for the horn pins, relay, and wires.
- We also recommend a 20A inline fuse.
You can get these parts from any store that sells automotive electrical parts, such as fuses and different wire gauges.
To save you time and money, we have ready-made relay kits available:

Dual Track relay kit:
https://motohorn.com/kit/
- Allows keeping OEM horn for triple-tones.
- Guarantees peak loudness on any ride.
- Solves thin wire-related problems.
- Has a built-in fuse.
- Includes an easy-to-follow user manual.
INSTALLING A 10-40A RELAY
We recommend keeping the relay closer to the battery, for example underneath the saddle. Relay pins are numbered.
Use 18 AWG wire:
- Connect pin 85 and 86 to the wires behind the stock horn.
- It won’t matter which pin gets positive or negative (works both ways).
Your relay is now operational.
FINAL CONNECTIONS
Use 14 AWG wire:
- Connect pin 30 to your battery positive.Optional: add inline fuse on this wire.
- Connect pin 87 to both dual horns, use one pin on each horn.TIP: Make Y-split at end of this wire.
- Connect the remaining two Dual Track pins to the battery negative.
Dual Track pins work both ways. Positive and negative terminals are not marked.

Congratulations! Your Dual Track is ready to use!
Need help? Email us:
support@motohorn.com